Physical Address
304 North Cardinal St.
Dorchester Center, MA 02124
Physical Address
304 North Cardinal St.
Dorchester Center, MA 02124

First, update and upgrade your system to the latest version with the following commands.
sudo apt update
sudo apt upgrade
Next, install the web server (Nginx), the database (MariaDB), and the necessary PHP packages.
sudo apt install nginx mariadb-server php-mysql php-curl php-gd php-zip php-fpmTo allow HTTP connections over port 80 on the server, execute the following commands.
sudo iptables -I INPUT 6 -m state --state NEW -p tcp --dport 80 -j ACCEPT
sudo netfilter-persistent save
If you are planning on installing an SSL certificate, you will also need to do this for port 443 as well.
Create a database and a database user for WordPress with the following commands. You can access the database command prompt by typing sudo mysql. Please change the username, password, and database name to something appropriate for your system.
CREATE USER 'yourname'@'localhost' IDENTIFIED BY 'yourpassword';
GRANT ALL PRIVILEGES ON *.* TO 'yourname'@'localhost';
CREATE DATABASE wpdb;
FLUSH PRIVILEGES;
exitTo download and install WordPress, execute the following commands.
sudo rm /var/www/html/index.nginx-debian.html
cd /var/www
sudo wget https://wordpress.org/latest.tar.gz
sudo tar xvfz latest.tar.gz
sudo chown -R www-data:www-data /var/www/wordpressWe need to tell the Nginx web server about WordPress. Edit the configuration file at
/etc/nginx/sites-available/default to look similar to this while adding your own domain name to the server_name field and ensuring that the socket file at
/var/run/php/php7.4-fpm.sock actually exists. If a different version of PHP is installed, use that version instead.
server {
    listen 80 default_server;
    listen [::]:80 default_server;
    root /var/www/wordpress;
    index index.php;
    server_name tonys.surf www.tonys.surf;
    location ~ \.php$ {
        include snippets/fastcgi-php.conf;
        fastcgi_pass unix:/var/run/php/php7.4-fpm.sock;
    }
}
After testing your configuration changes with
sudo nginx -t, apply your changes by restarting the Nginx server.
sudo systemctl restart nginxIn order to allow users to navigate to your domain name to access your website, you need to add a DNS A record that essentially points your domain name to your IP address. This is typically done at your domain registrar (i.e. the place where you bought your domain name).
In case you are not familiar with this process, here is a video to walk you through it.
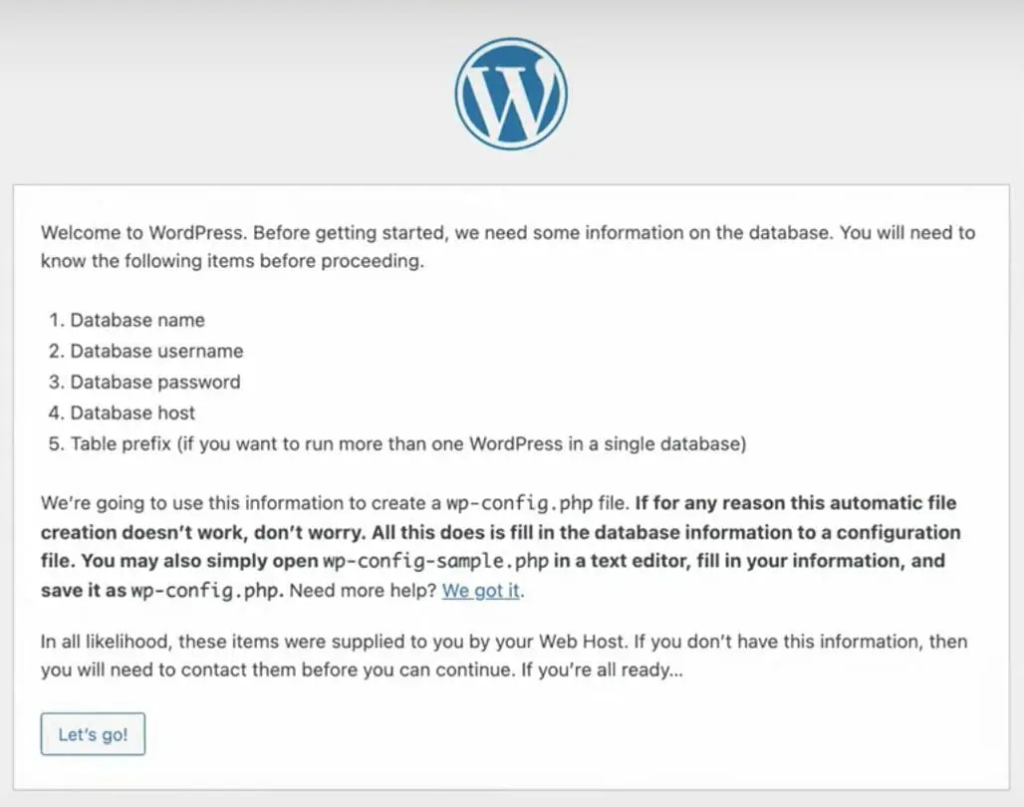
In a web browser, navigate to your domain name. A page similar to this welcoming your to WordPress should show up.

Follow the installation, providing the database credentials that you chose earlier. On the following page, you can choose a name for your website as well as a username and password to login to your WordPress administrator dashboard.
Complete the installation by clicking on the “Install WordPress” button. Login to your new website and get to work!